Homemade ghee recipe with step-by-step photos and instructions. Learn to make your own ghee at home which is healthy and preservative free.
Traditionally, ghee making was a household practice. Every month the heavenly aroma of ghee would fill our homes. With life getting busier day by day (for no apparent reasons, we are busy being busy 😃) and with the availability of store-bought ghees we have given up on making ghee at home. I prepare ghee from buffalo’s milk which I procure from the local milkman. Preparing ghee at home may look cumbersome but believe me once you start making ghee at home you will fall in love with the process. This post will be detailed and long as I will be covering all the aspects related to ghee. So hang on…
What is Ghee?
Ghee is known as ‘ghrita’ in Sanskrit which means ‘to sprinkle‘. It is known as ‘clarified butter‘ in English, ‘gharave tup‘ in Konkani, ‘sajuk tup‘ in Marathi, ‘Neyi‘ in Tamil, Malayalam and Telugu. Ghee is prepared by collecting fresh cream from boiled and cooled (preferably refrigerated) milk. The collected cream is churned to butter and then simmered to get a clear, golden liquid which is called ‘ghee‘.
Ghee is one of the most essential ingredients in Indian cuisine. Once condemned being fattening, people are awakening to its many known and unknown benefits. According to ancient Ayurveda, it is full of essential nutrients, fatty acids and anti-oxidants. It is anti-bacterial, anti-fungal and has anti-viral properties. If included in moderation ghee can bless you with all its benefits.
No puja is complete without ‘panchamrit‘ that includes all dairy products of which ghee is indispensable. In Hinduism, from birth to death all rituals include ghee… From dals to sweet dishes some food items would not taste the same without ghee. More importantly all these high calorie dishes can be digested and assimilated well in the body only if you add that spoonful of ghee. So do not skip ghee when you have dal-rice, puranpolis, modaks etc. Just include a spoon of ghee in your diet everyday and all your woos of joint aches, weak memory will be taken care of.
Why prepare ghee at home?
- Homemade ghee is pure, unadulterated, organic and preservative free.
- It has a much better taste and flavour than commercial ghee.
- Store-bought ghees are very expensive. If you buy milk daily then preparing ghee will be an added bonus.
- When ghee is pure and homemade, it lasts longer without refrigeration.
- It gives you much more benefits than market ghee.
I have divided the ghee making process into 2 phases.
Phase I – This phase involves making ghee from scratch. From collecting cream to preparing butter, which is the raw material for making ghee.
Phase II – This phase involves simmering butter to get a clear, golden liquid; i.e. ghee. If you want to prepare ghee from store-bought butter you can skip phase I and start from here.
Which milk should I use to prepare homemade ghee?
Ghee prepared from the milk of Indian desi cow which has a hump (also known as A2 milk) is the best. If you do not have access to A2 milk you can prepare ghee from buffalo’s milk. You can also prepare ghee from packet milk if you do not have access to any local fresh milk.
How to store ghee?
- Use a clean, dry, glass or steel container. Do not store in plastic.
- Ghee has a shelf life of 3 months without refrigeration.
- Under right conditions, ghee can last for upto 1 year.
- Keep the container away from direct sunlight. Store in a cool and dark place.
- Use a clean and dry spoon.
- Refrigerate ghee if you stay in very hot and humid climates.
Ghee – The ideal fat for deep frying
Ghee is a pure fat. Due to its high smoking point of 250° C (482° F) it is an ideal medium for deep-frying. Wondering what is smoking point? Well, it is what it exactly means, the point at which oil or fat begins to smoke when heated. When oils or fats are heated past their smoking point, they generate toxic fumes and free radicals that are very harmful for your body. Now you see why ghee is a good medium for deep frying?
Benefits of homemade ghee
After being portrayed as a demon for a long time, ghee is back on the block as the new ‘superfood‘. However, our rituals, ancestors always had a different story to tell. Ghee was liberally used in their diets and yet our ancestors never seemed to put on weight or have heart issues. Or rather, because they had ghee they never had to battle those issues.
Now research proving the many countless benefits of ghee, thankfully, people have started including ghee in their diet. So here our some of the benefits of ghee…
- Ghee is a powerhouse of nutrients. Rich in anti-oxidants, it is loaded with fat-soluble vitamins A, D, E and K.
- Ghee lowers the glycemic index of food which means it slowly releases energy in the body which keeps you fuller for longer.
- It boosts physical strength and improves mental health. Keeps you calm and prevents mood swings.
- Ghee contains short chain fatty acids (SCFA) which promote fat burning and mobilise fat from stubborn areas. The to-and-fro action of the wooden churner (Ravi) does not break the fragile fatty acid bonds. That is why I recommend not to use a mixer or food processor for the churning process.
- The SCFA in the ghee maintains the strength and diversity of gut bacteria. Ghee is thus now seen as a ‘prebiotic‘ (provides an environment for gut bacteria to prosper). Addition of curd to cream before churning, precisely does this. Hence it is a great anti-allergen.
- It maintains healthy cholesterol, lowers bad cholesterol and is good for people who are lactose intolerant.
- Ghee strengthens joints and prevents constipation.
- It’s high smoking point prevents it from producing free radicals that damage cell function. That is why, traditionally, ghee was used for deep frying.
Tips to prepare good homemade ghee
- Use high-fat milk to prepare ghee.
- Always collect cream in a glass or steel container. Avoid plastic.
- To obtain thick cream from milk, boil milk and refrigerate for 7-8 hours.
- Always store collected cream in freezer to prevent it from turning sour and rancid.
- Use a deep pot or pan to simmer butter to prevent overflowing.
- Browning the milk solids gives a nice nutty flavour to ghee. However, do not burn the solids as ghee will turn bitter.
How to prepare homemade ghee? (Step-by-step photos and instructions)
Phase I
Preparing Butter
(COLLECTING CREAM AND CHURNING INTO BUTTER)
- Boil the milk thoroughly. Allow it to cool completely. Once the milk cools down, it forms a creamy layer on top. Skim this cream (malai) daily. Store it in a glass container in the freezer. (Alternatively, keep this milk in the refrigerator overnight or for 24 hours if possible. This yields thick cream.)
2. Keep collecting this cream everyday for about a month. Once collected remove the cream from the freezer and allow it to defrost and thaw till it reaches room temperature. Add 1/2 cup of fresh curd to it and mix well. Allow the cream to set like curd. You can allow it to set overnight.
Note: You can refrigerate this set cream for a day or two in the fridge (not freezer). This later on helps in separating the butter (loni) easily without much of churning.
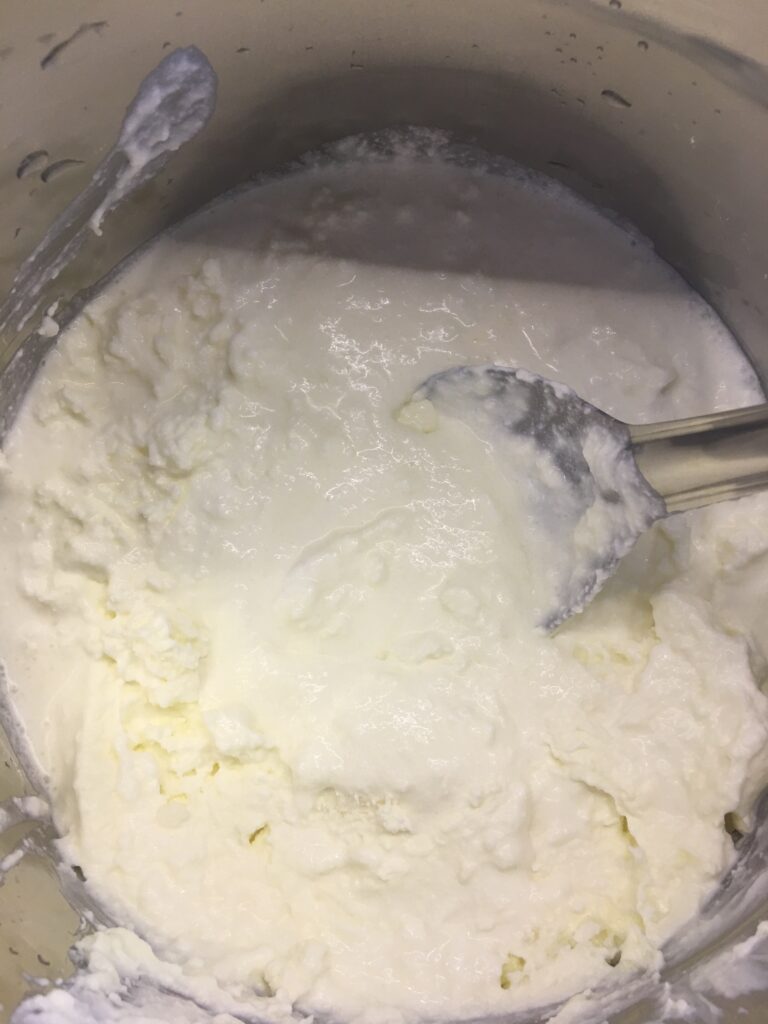

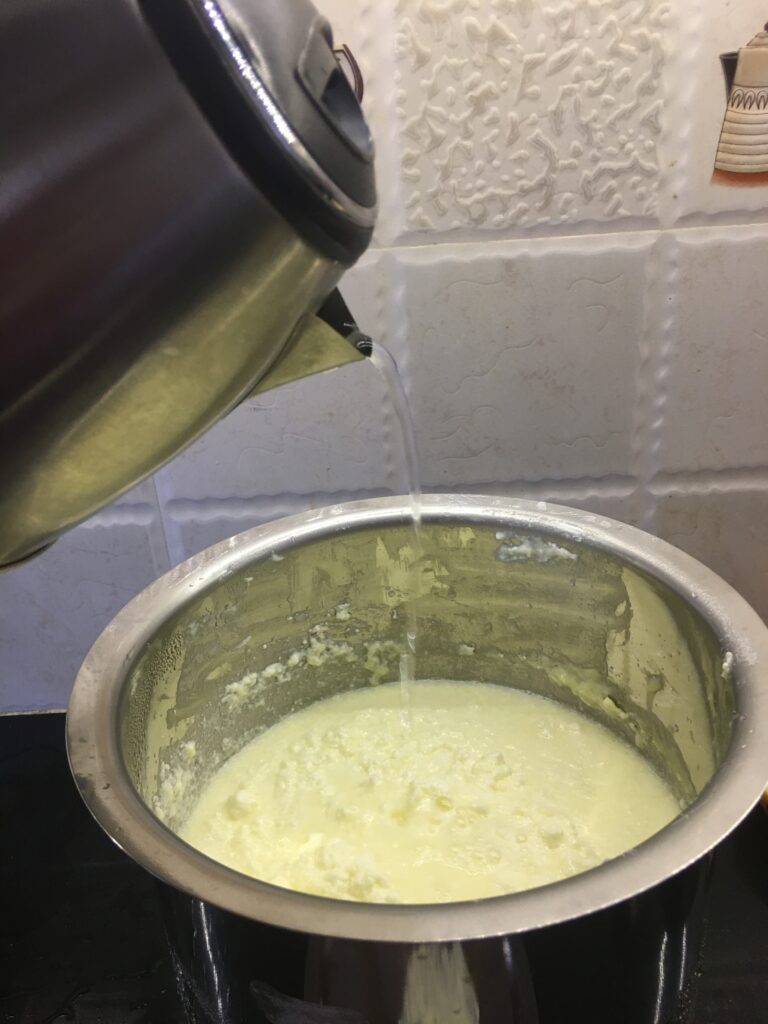
3. When the cream sets (it will have a texture similar to curd), transfer it to a long vessel. Add some warm water (not hot) to it.
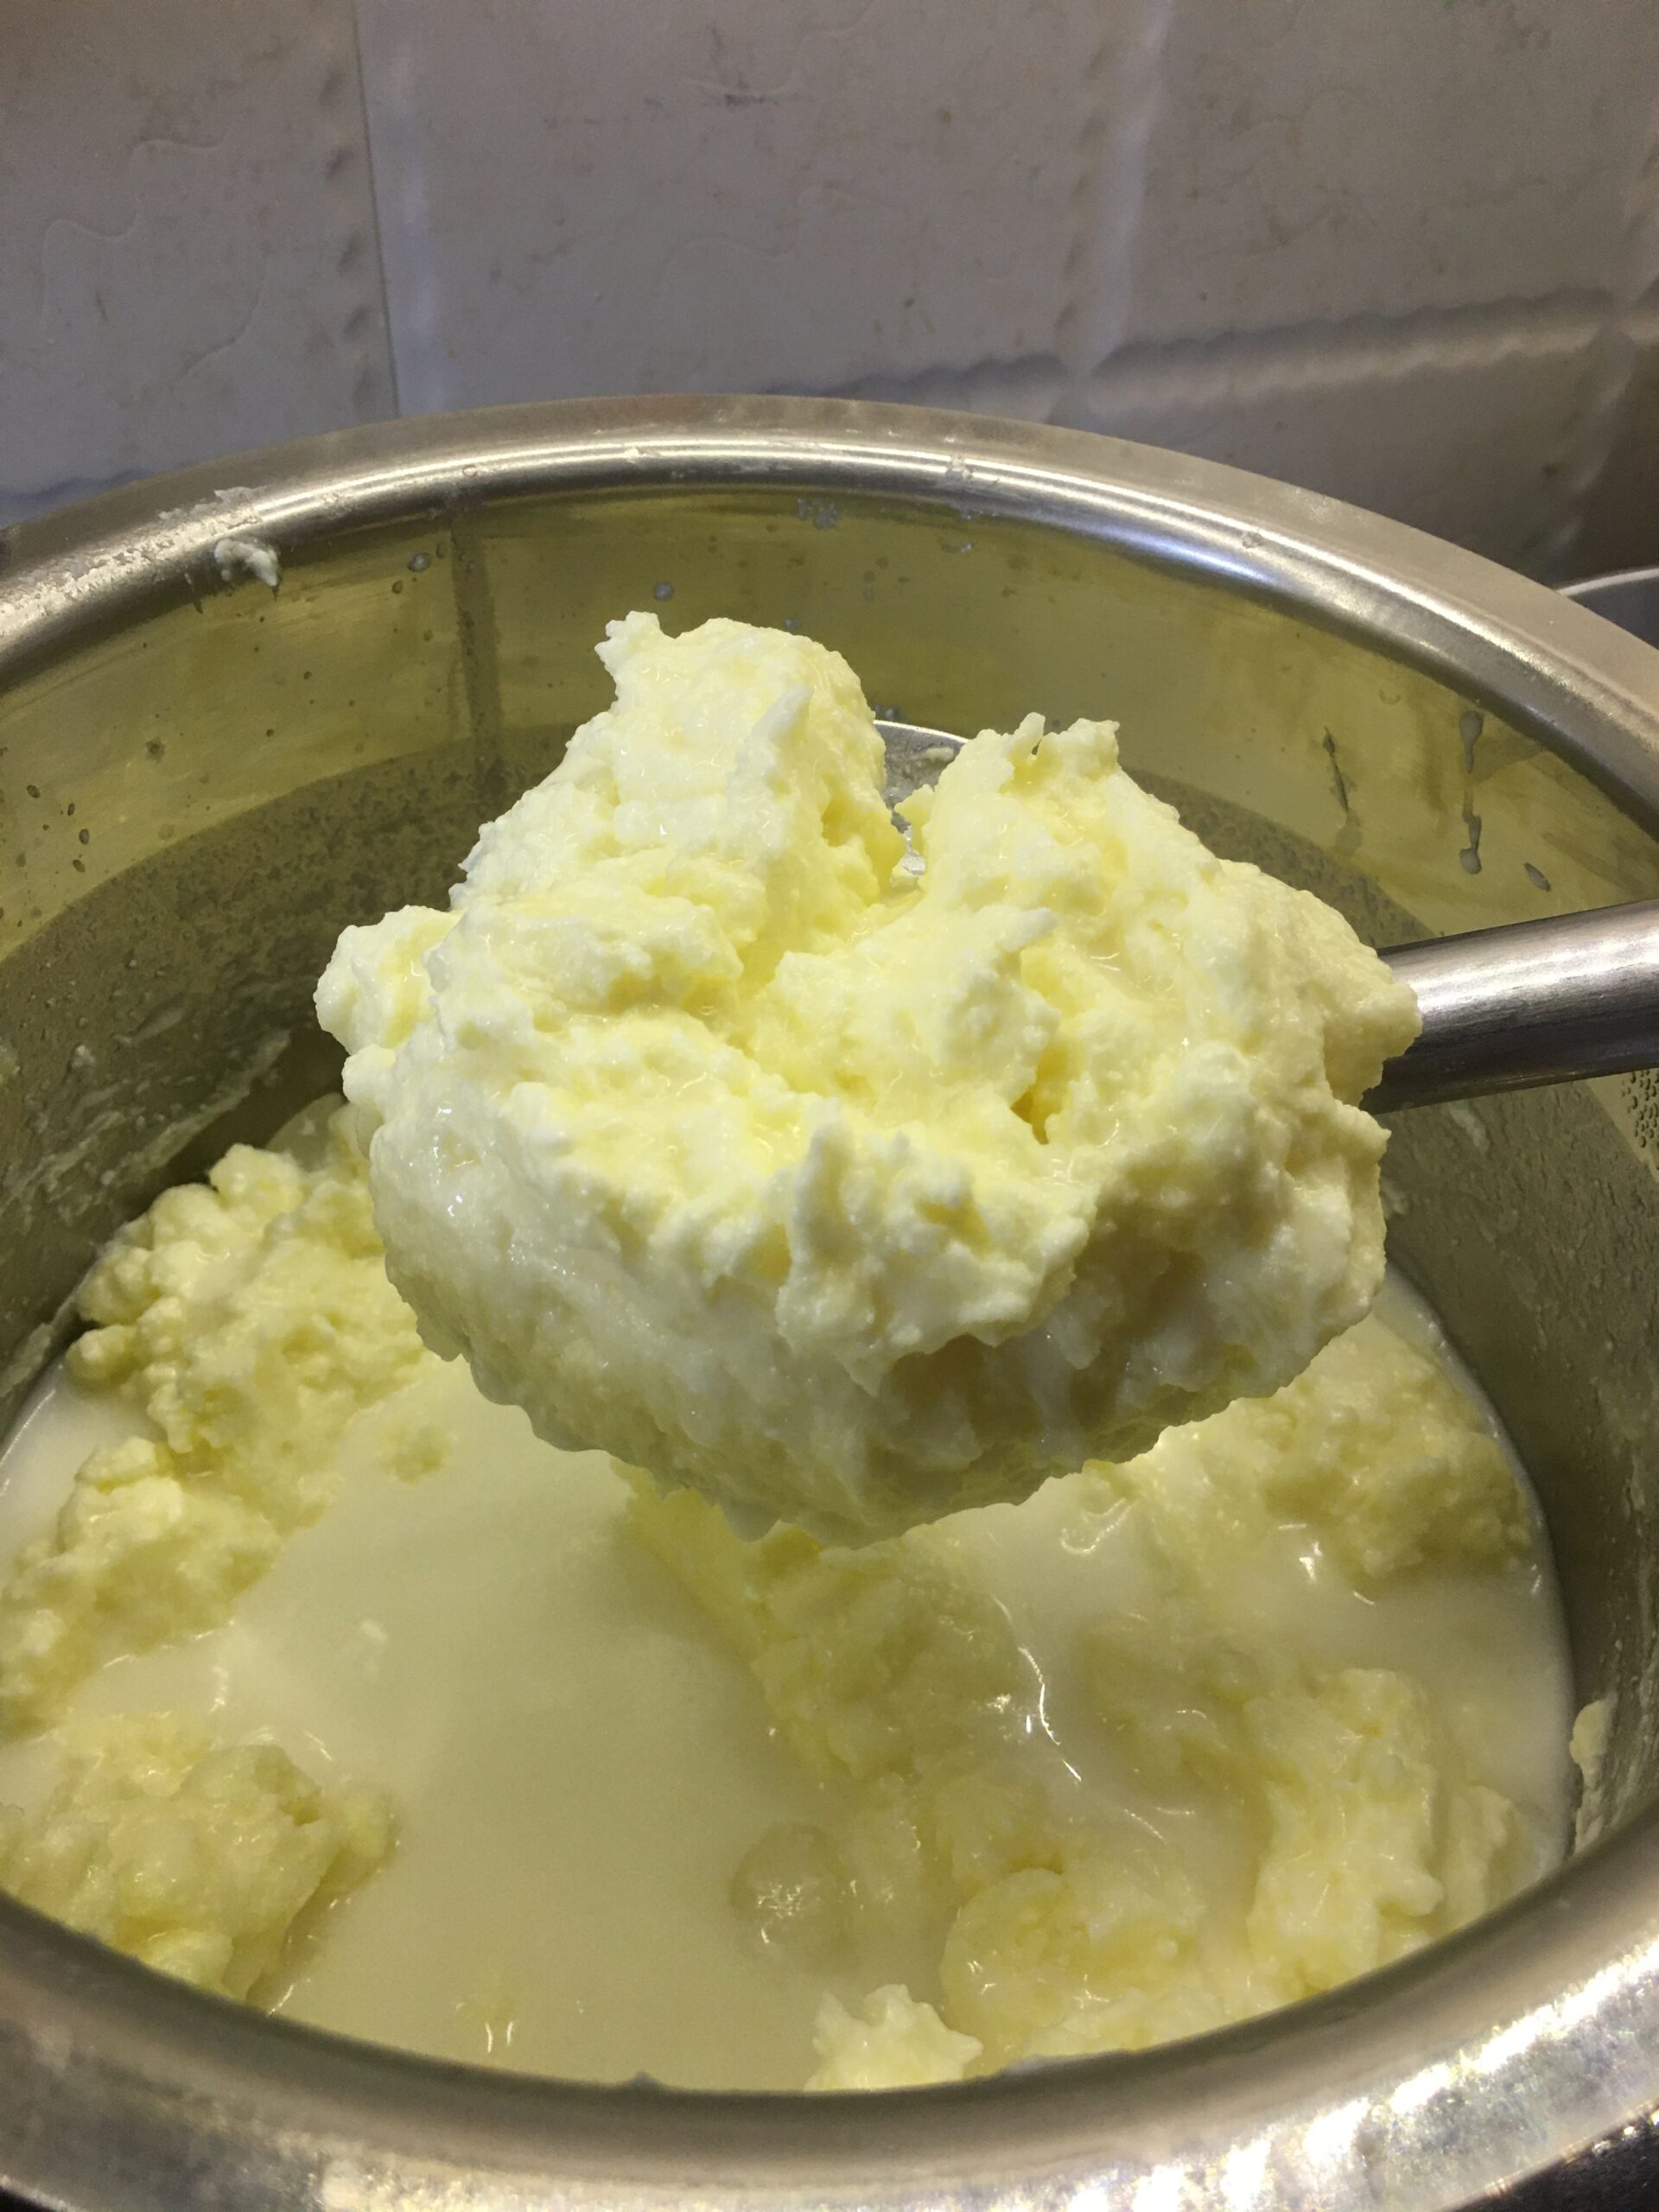
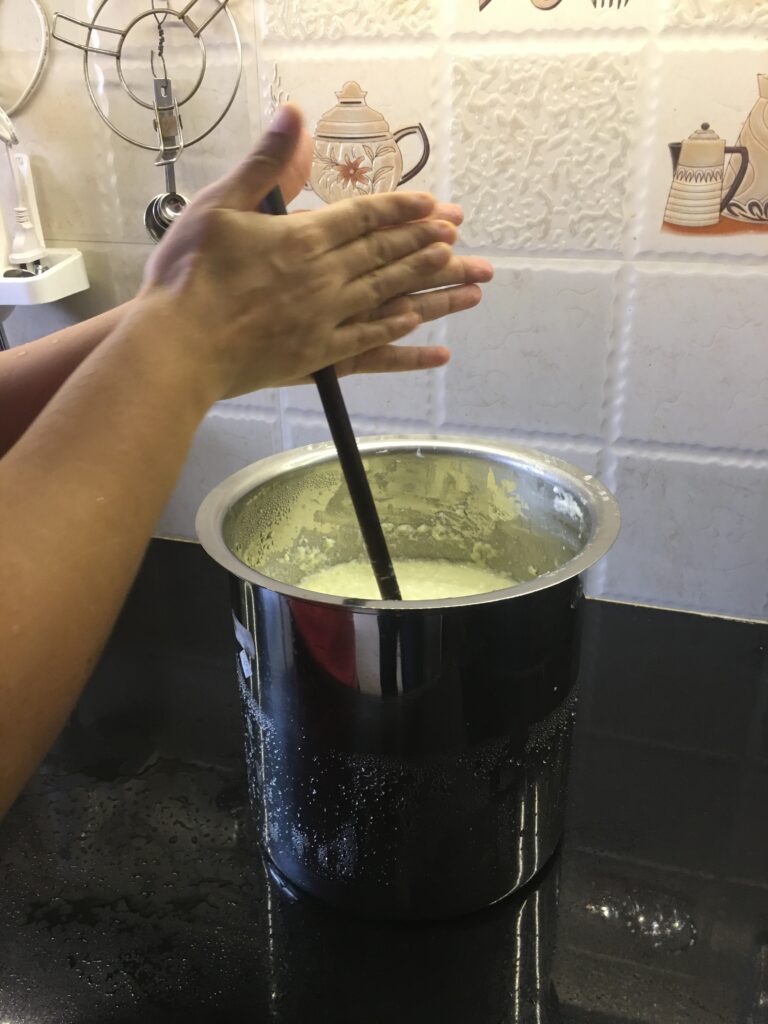
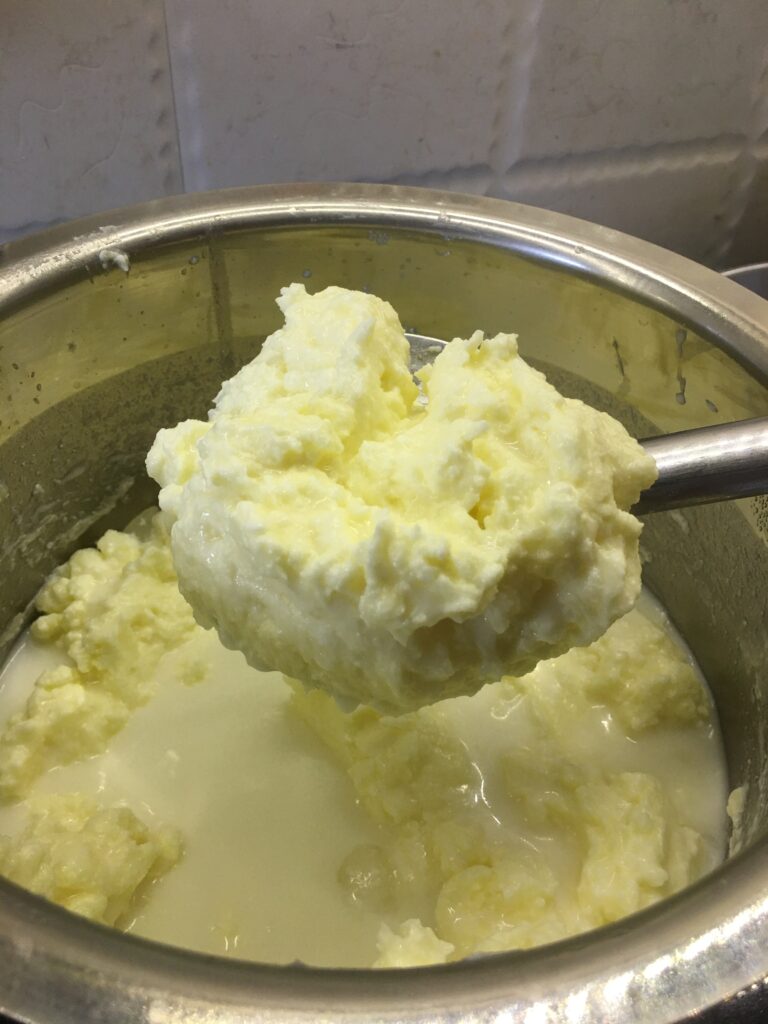
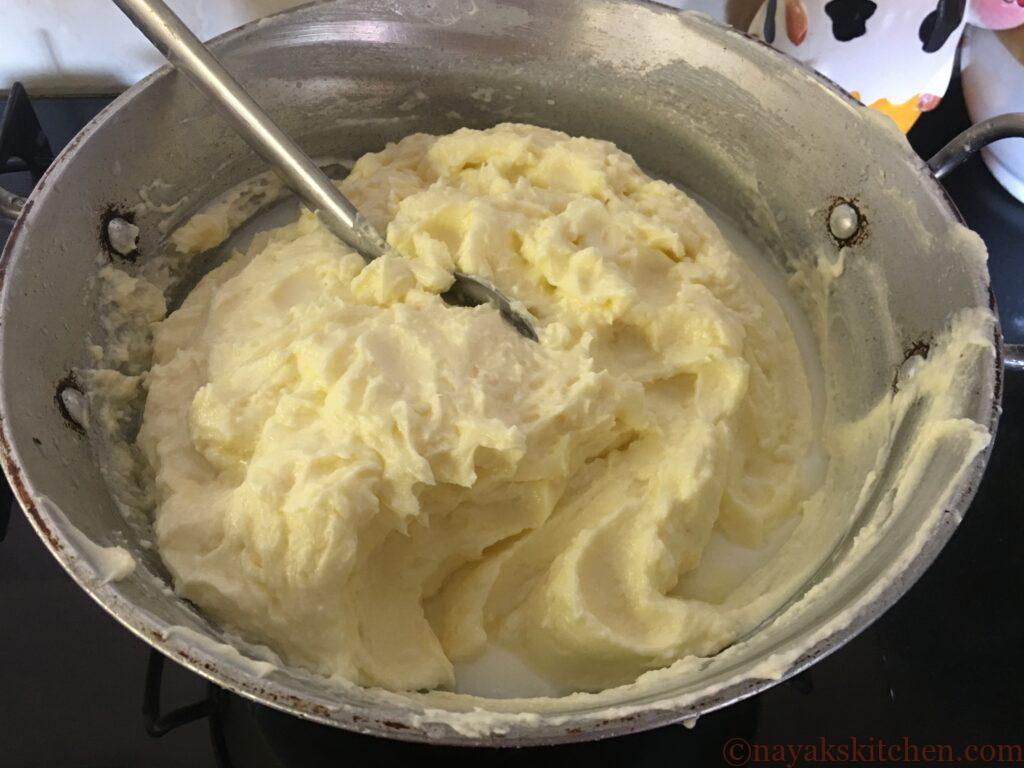
4. Churn the cream slowly with a wooden churner (ravi) using a to-and-fro motion. Do this till you start seeing butter separating.
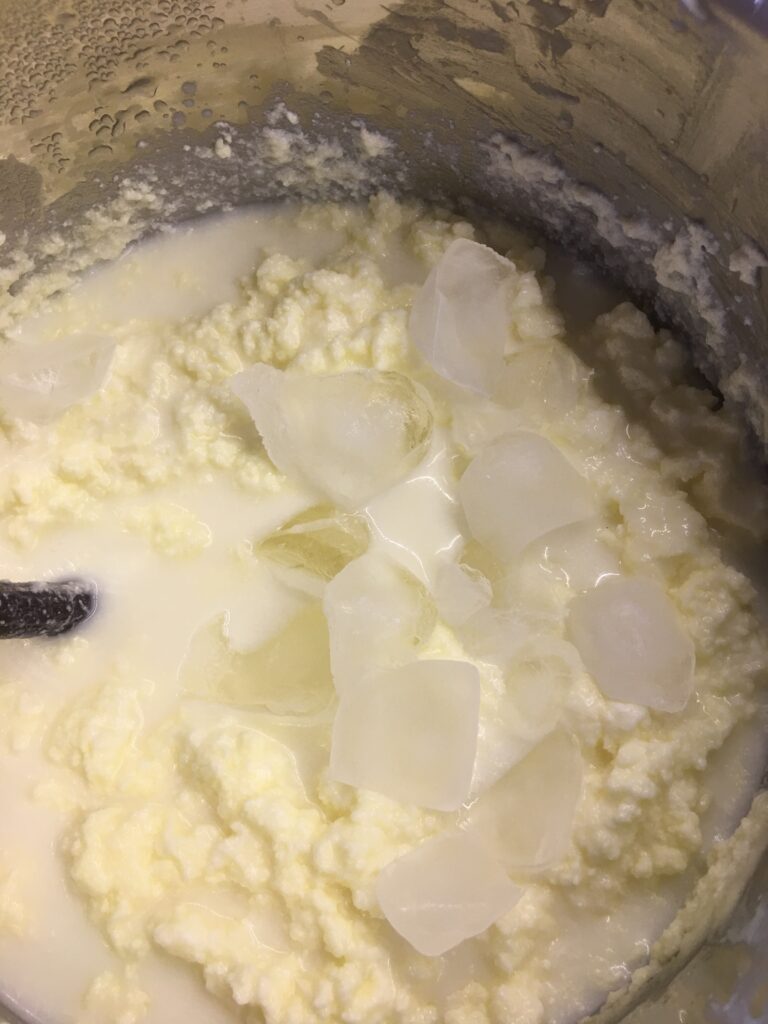
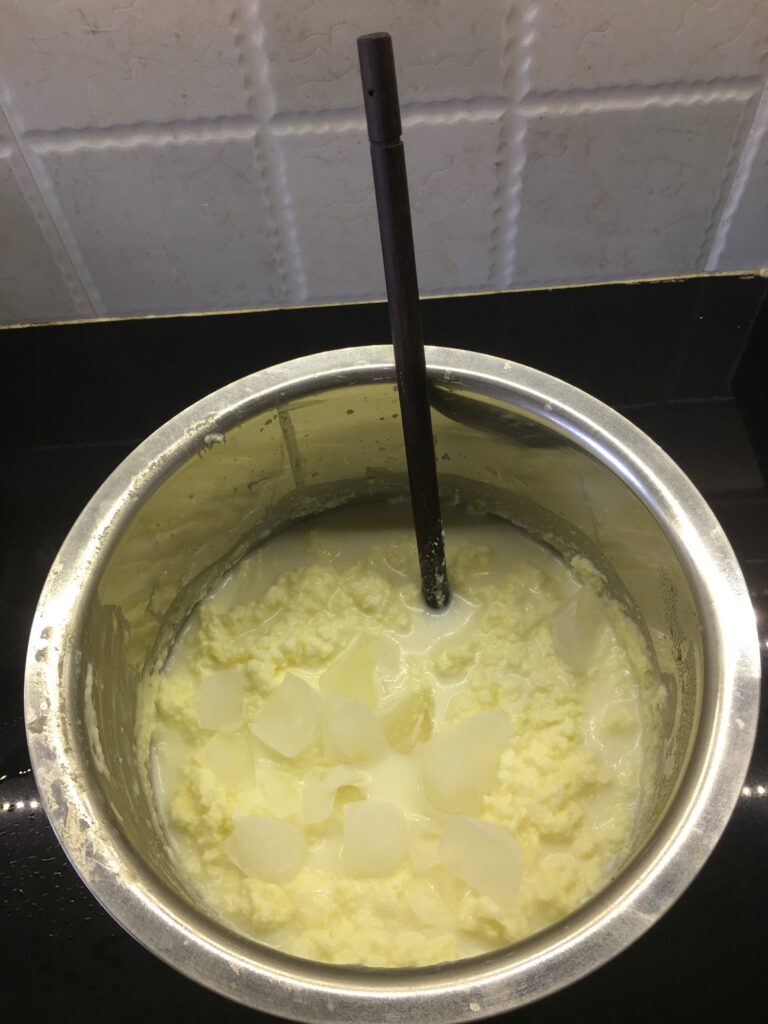
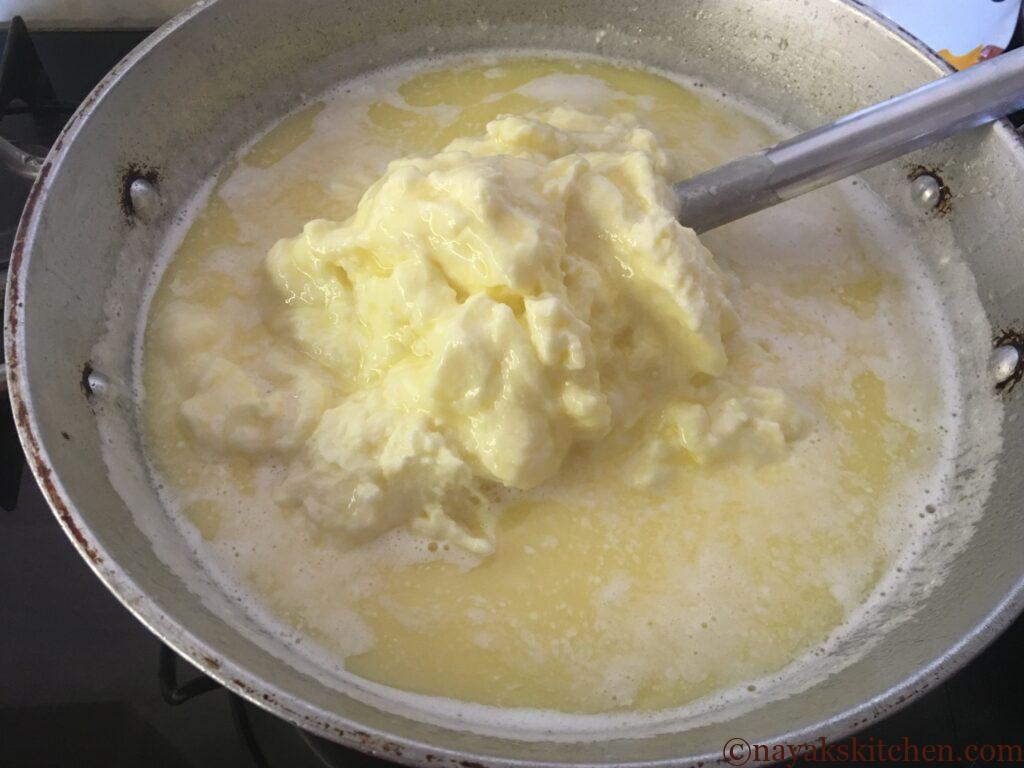
5. Once butter separates, add ice cubes. This helps separate butter very quickly. You will see chunks of butter forming.
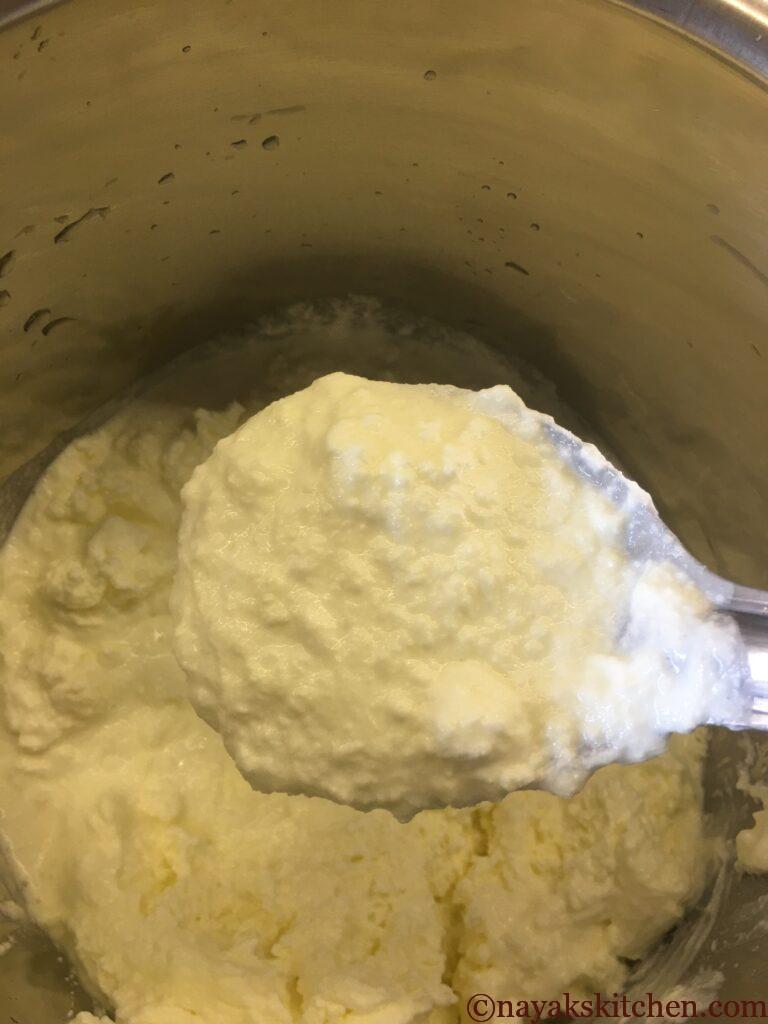
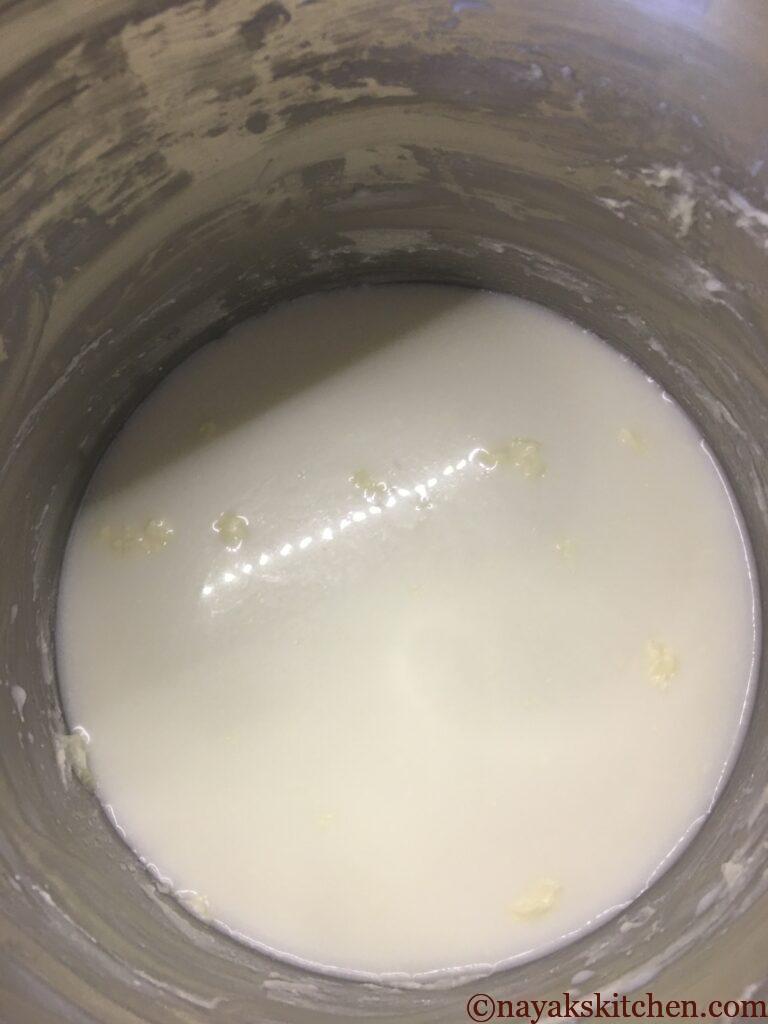
6. Collect this butter in a deep-bottomed pan or kadhai. This is butter or loni which is the raw material for making ghee. What is left in the vessel is buttermilk. You can drink this directly if it is not sour or rancid.
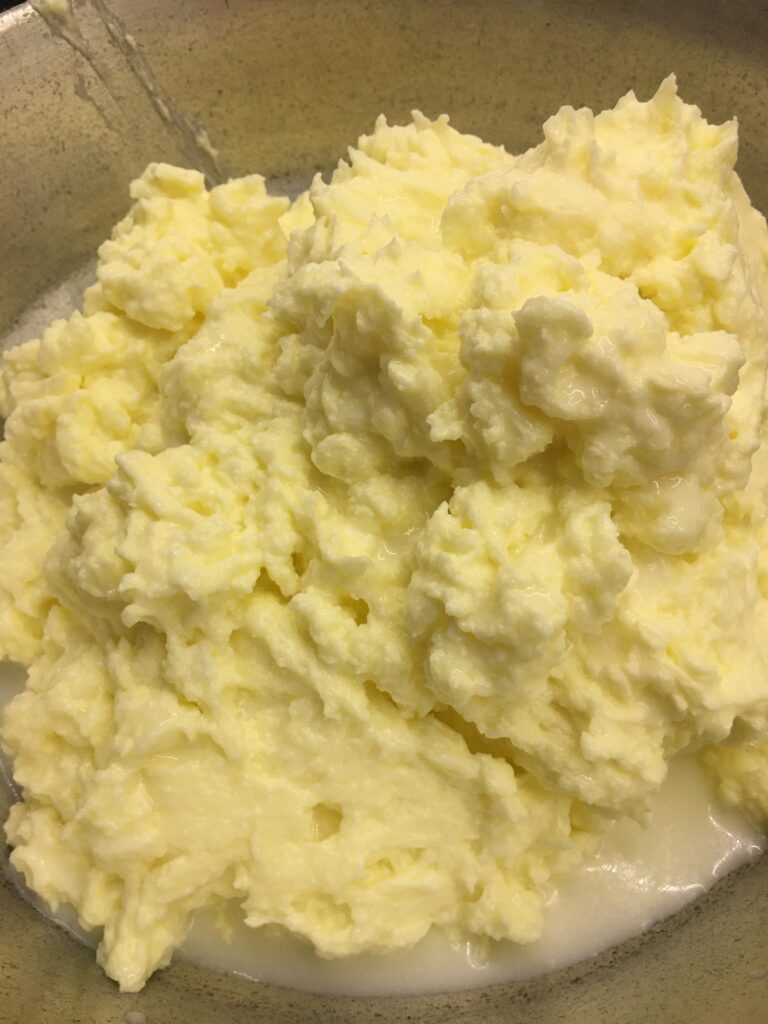
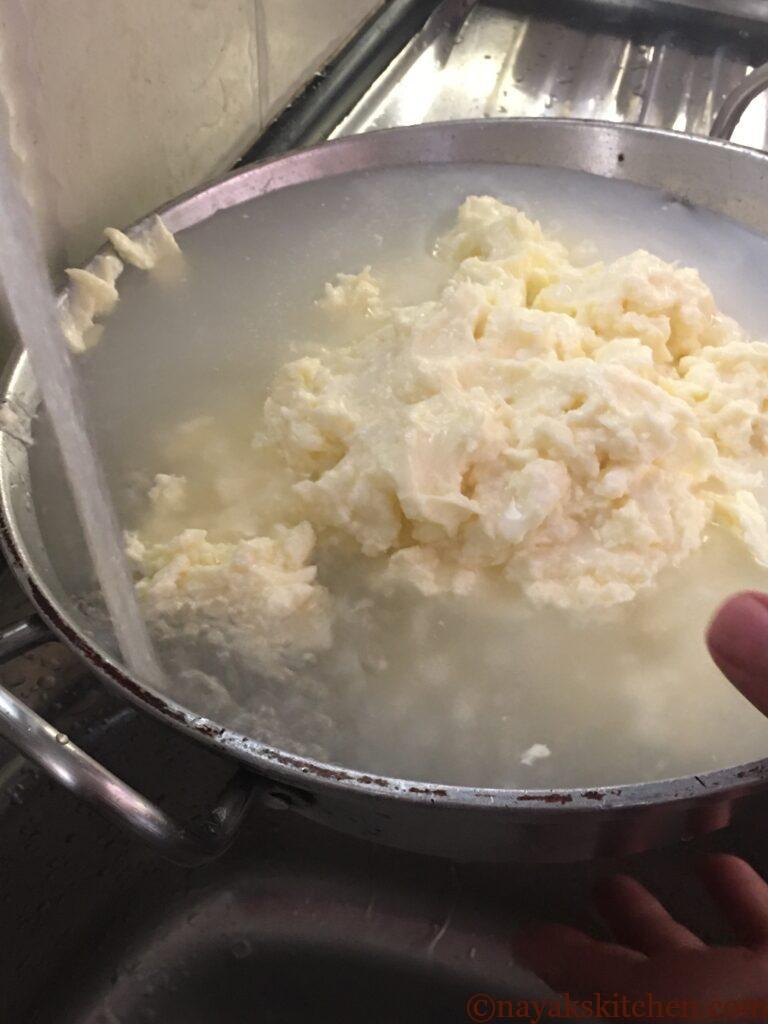
7. Wash the collected butter a couple of times with fresh water. Drain the water completely.
Phase II
Preparing Ghee
(CONVERTING BUTTER INTO GHEE)
Note:- If you are using store-bought butter to prepare ghee you can proceed from here.
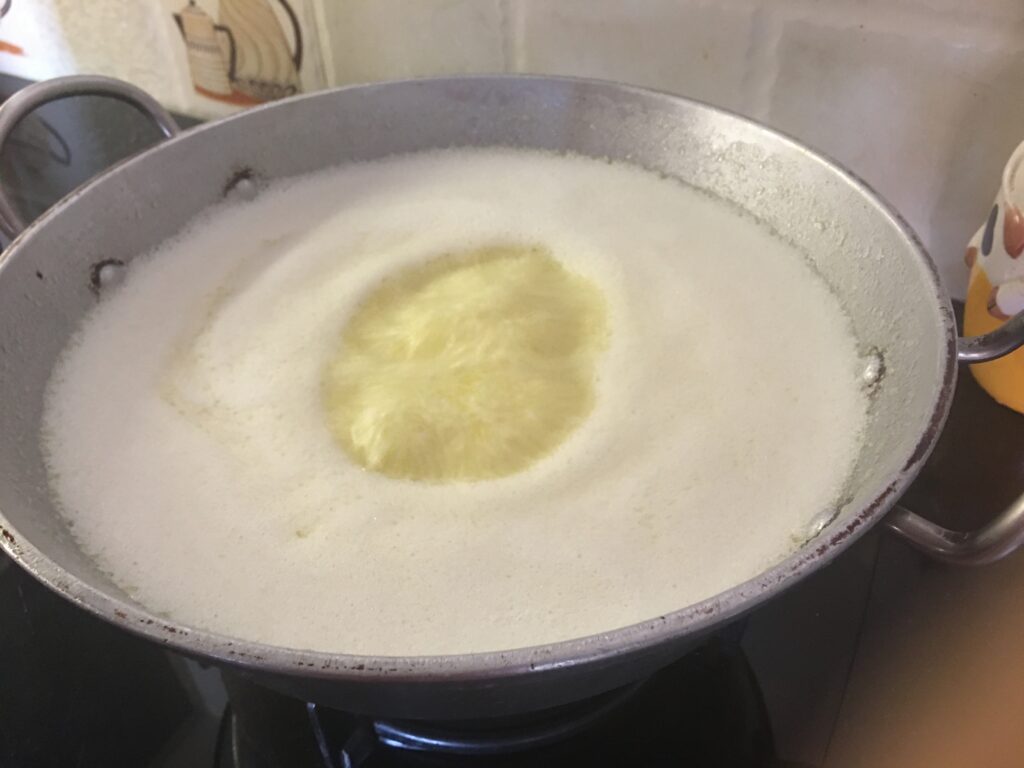
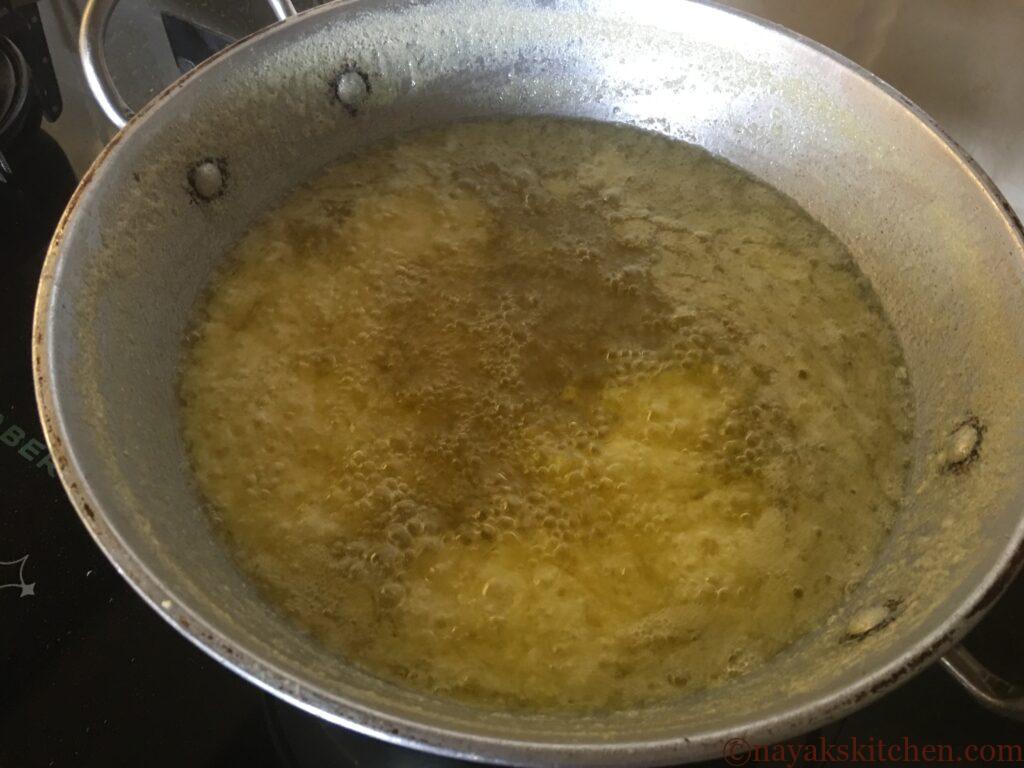
- Place the kadhai with the collected butter on the gas stove. On high flame, allow the butter to melt completely.

2. Once the butter melts completely, reduce the flame to low-medium.


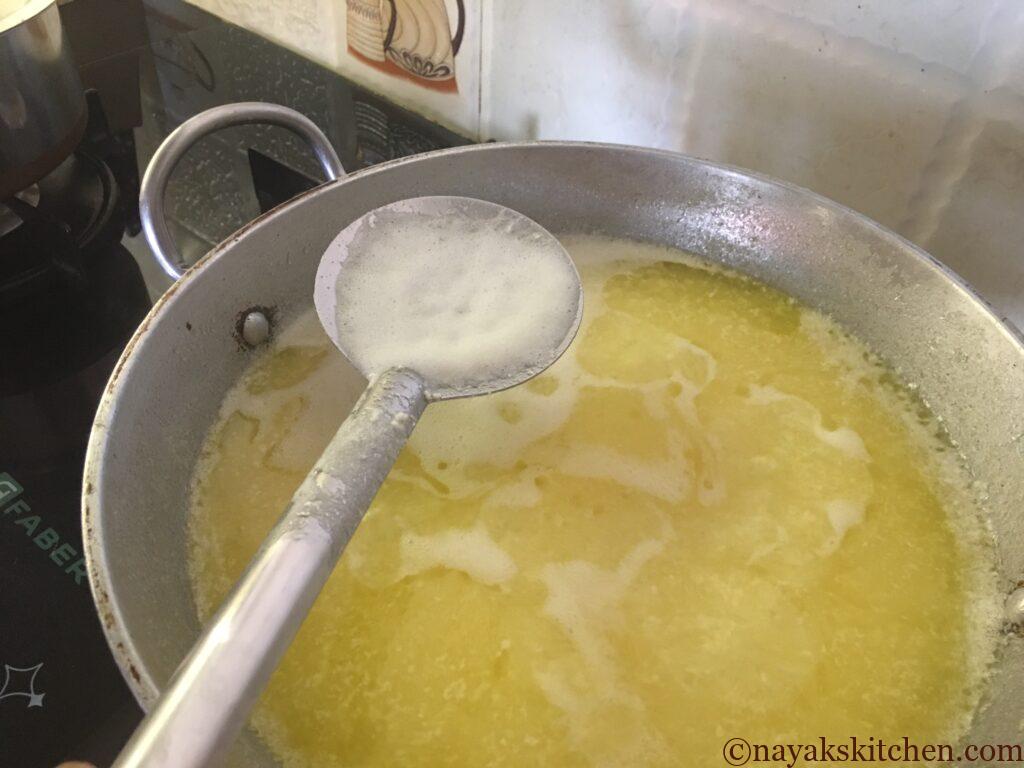
3. As the butter boils further, a frothy layer forms on its surface.
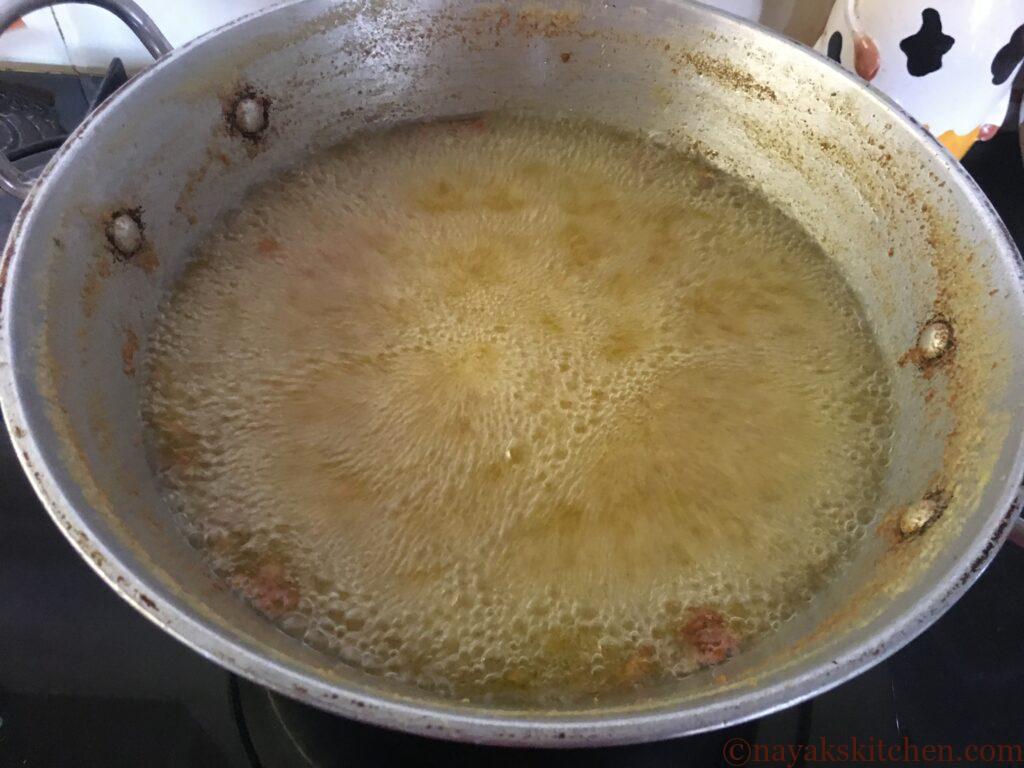
4. Remove this froth as much as possible with a spatula.
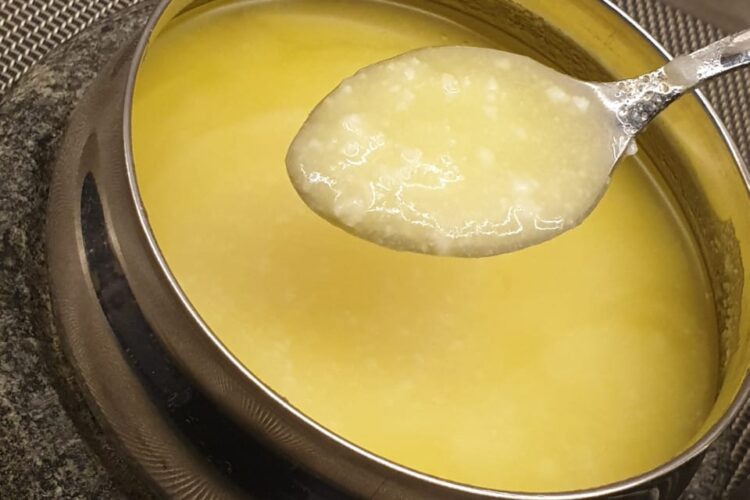
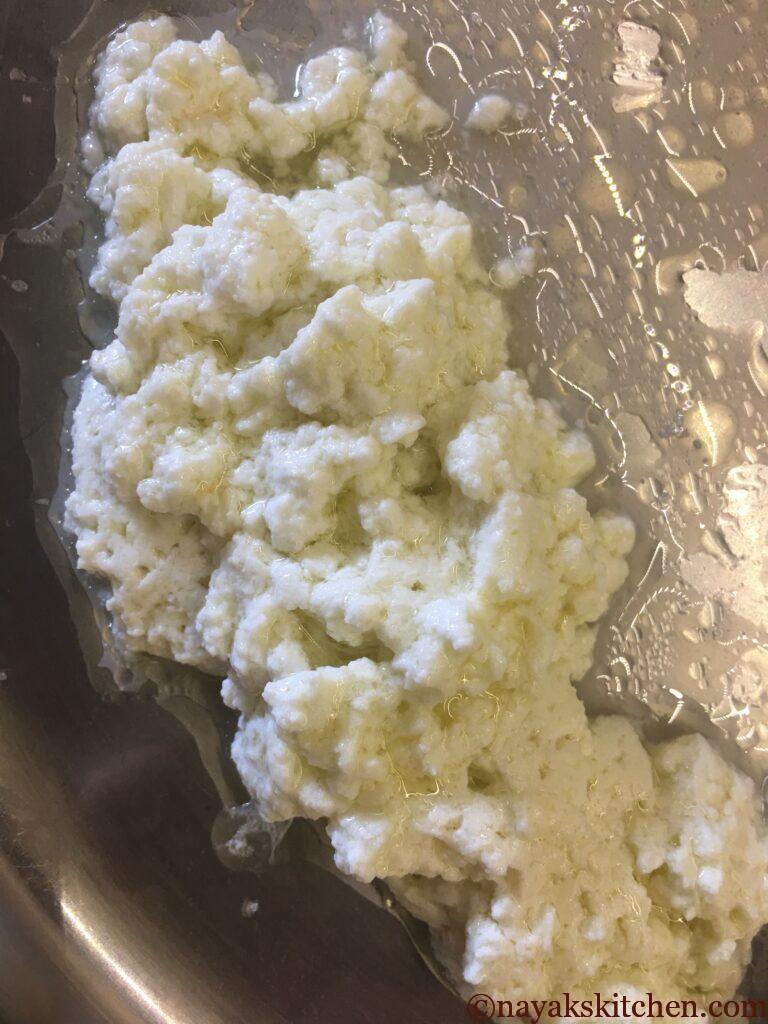
5. After sometime milk solids start settling at the bottom. Scoop as much as possible from the bottom of the kadhai.
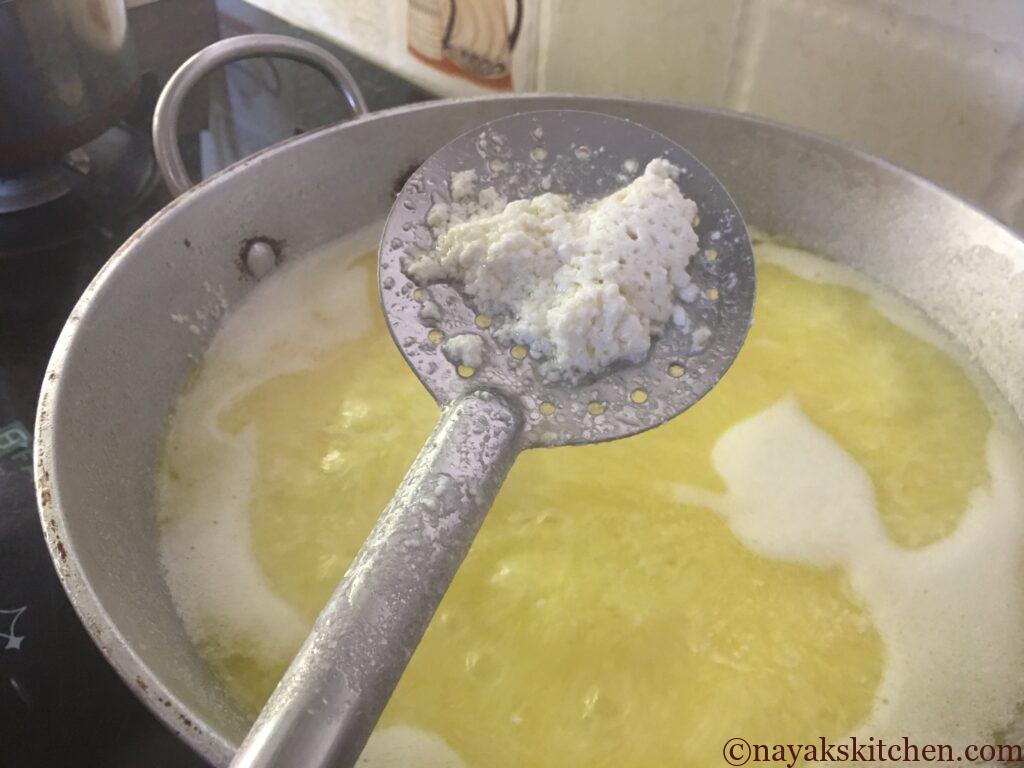
6. In the pic below, you can see the scooped milk solids collected on a plate.
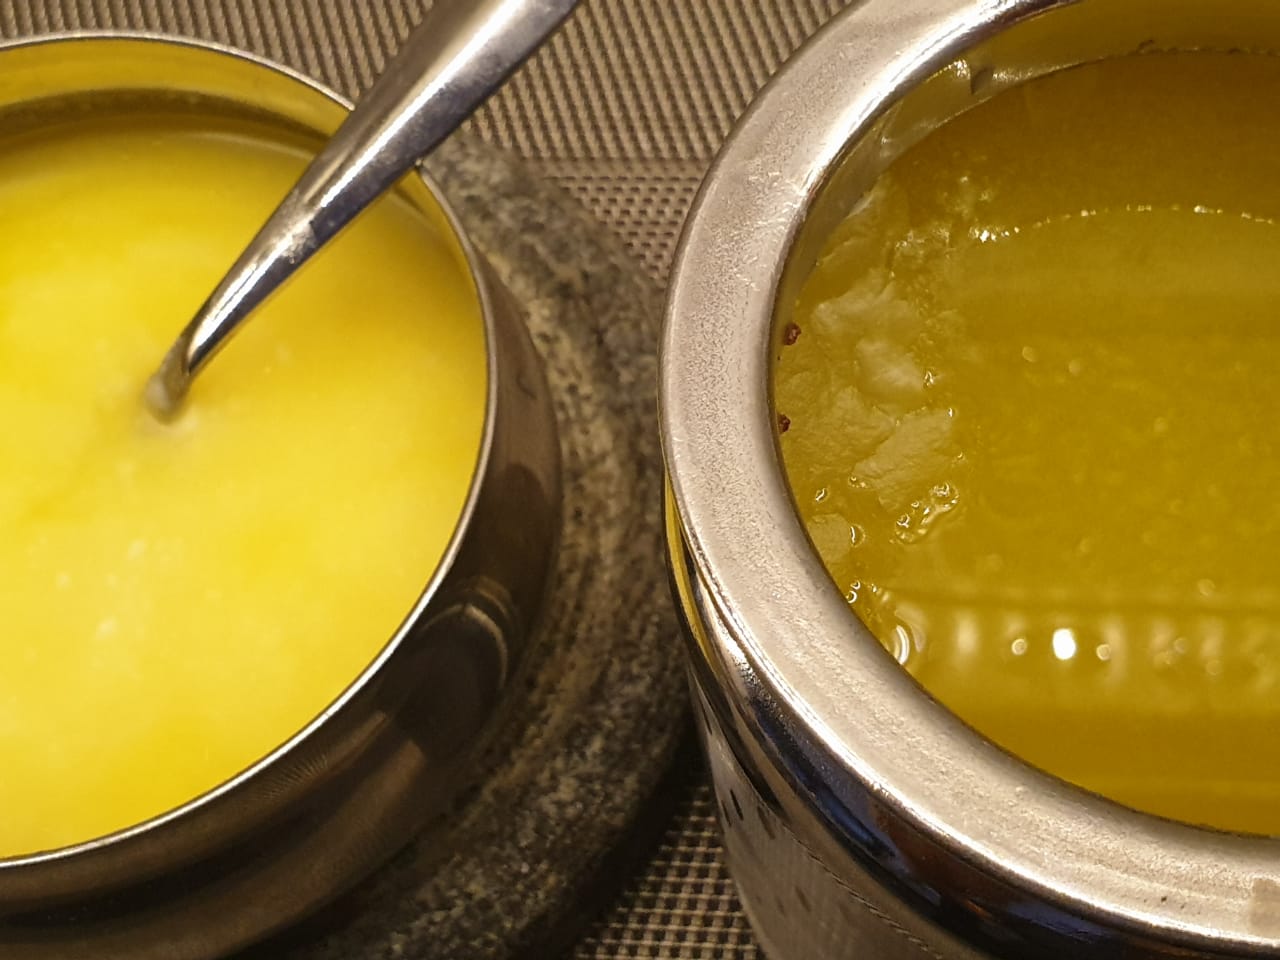
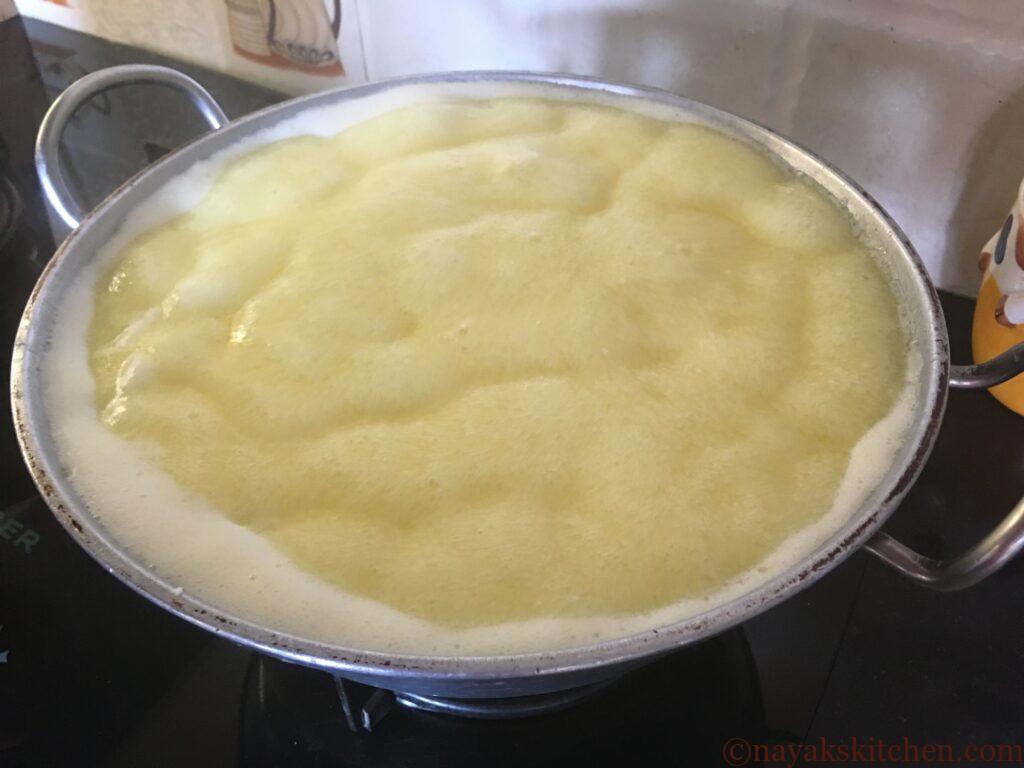
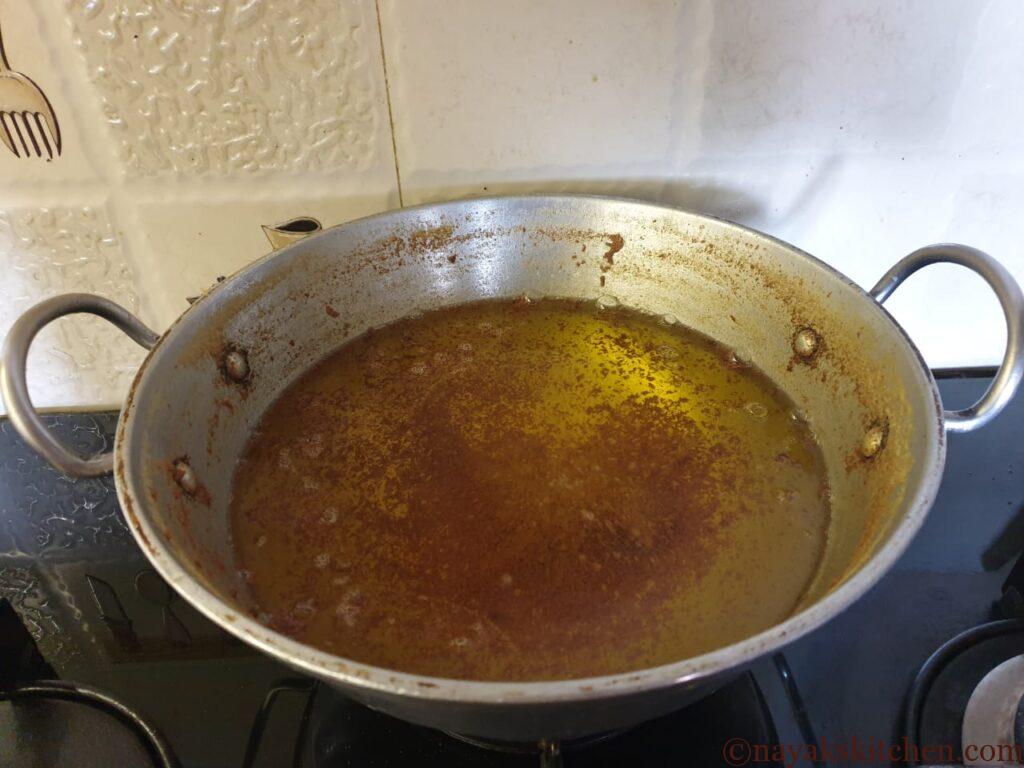
7. Boil further till the butter changes to a light-golden clear liquid. In the pics below you can see the different stages. By now a pleasant and heavenly aroma will fill your house. Your entire neighbourhood knows you are preparing ghee 😜.

8. When the milk solids turn slightly brown, switch off the gas. The ghee continues to cook in the pot for sometime.
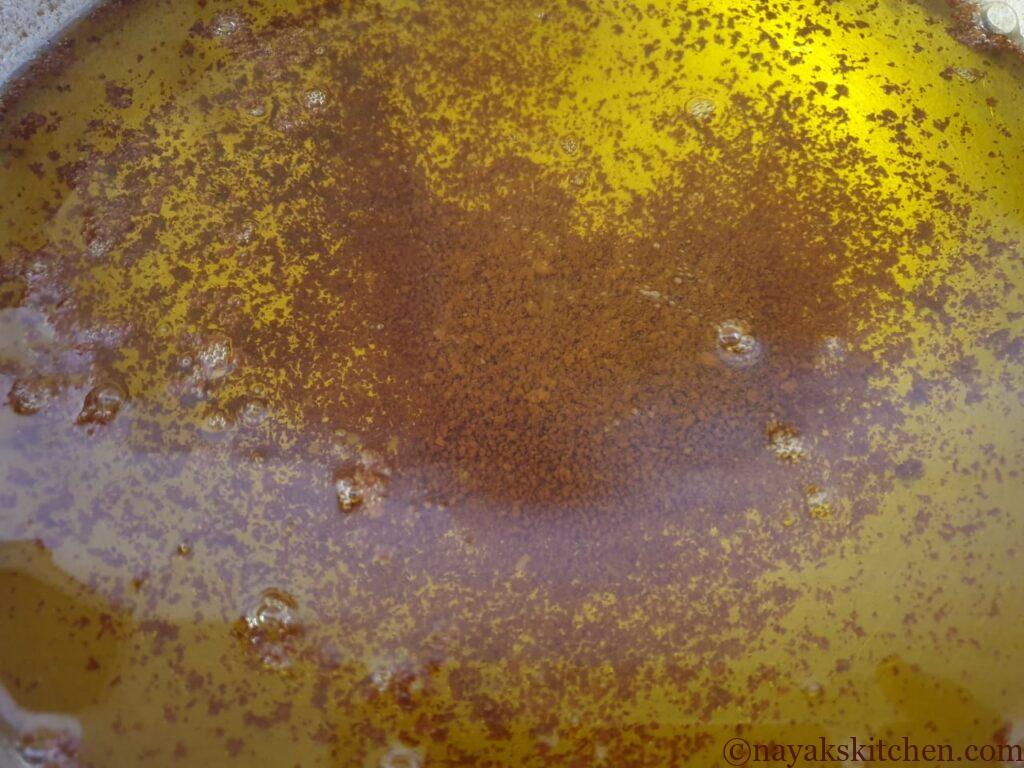
9. Strain the ghee and store it in a clean and dry container. As time passes ghee will start solidifying. If it is granular (rava-like granules) then know you have perfectly done it. More power to you!!
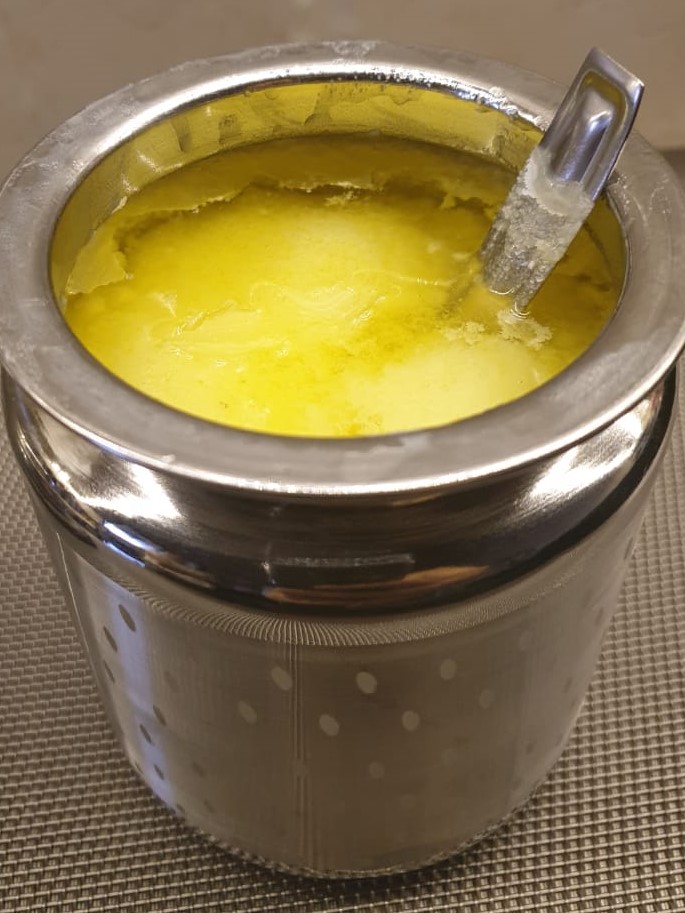
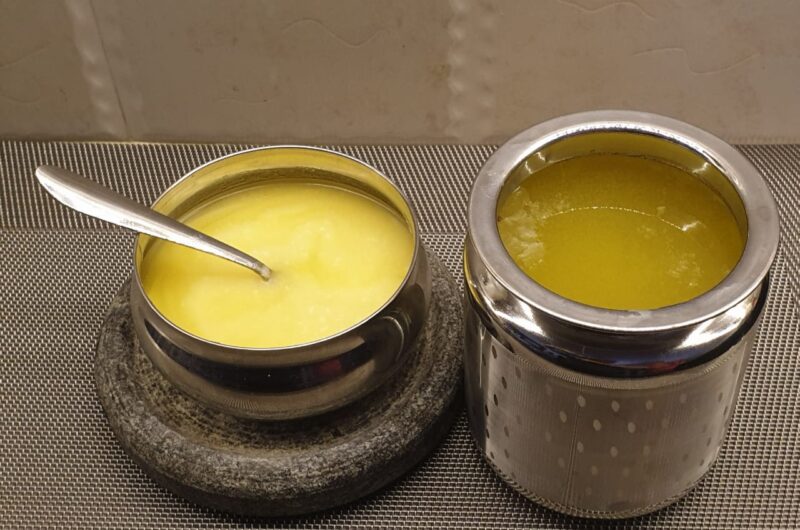
Learn the art of making perfect homemade ghee through this step-by-step recipe.
Ingredients
1 CUP =250 ML
Cream/Malai – collected for about a month
Fresh curd – 1/2 cup
Warm water – 1 litre/4 cups or as required
Directions
- Phase I (Preparing Butter)
- Boil the milk and allow it to cool completely. Once the milk cools down, it forms a creamy layer on top. Skim this cream(malai) daily. Store it in a glass container in the freezer. (Alternatively, keep this milk in the refrigerator overnight or for 24 hours if possible. This yields thick cream.)
- Keep collecting this cream everyday for about a month. Once collected remove the cream from the freezer and allow it to defrost and thaw till it reaches room temperature. Add 1/2 cup of fresh curd to it and mix well. Allow the cream to set like curd. You can allow it to set overnight.
- When the cream sets (it will have a texture similar to curd), transfer it to a long vessel. Add some warm water (not hot) to it.
- Churn the cream slowly with a wooden churner (ravi) using a to-and-fro motion. Do this till you start seeing butter separating.
- Once butter separates, add ice cubes. This helps separate butter very quickly. You will see chunks of butter forming.
- Collect this butter in a deep-bottomed pan or kadhai. This is butter which is the raw material for making ghee. What is left in the vessel is buttermilk. You can drink this directly if it is not sour or rancid.
- Wash the collected butter a couple of times with fresh water. Drain the water completely.
- Phase II (Preparing Ghee)
- Place the kadhai with the collected butter on the gas stove. On high flame, allow the butter to melt completely.
- Once the butter melts completely, reduce the flame to low-medium.
- As the butter boils further, a frothy layer forms on its surface.
- Remove this froth as much as possible with a spatula.
- After sometime milk solids start settling at the bottom. Scoop as much as possible from the bottom of the kadhai.
- Boil further till the butter changes to a light-golden clear liquid.
- When the milk solids turn slightly brown, switch off the gas. The ghee continues to cook in the pot for sometime.
- Strain the ghee and store it in a clean and dry container. As time passes ghee will start solidifying.
Recipe Video
Notes
- Use full-fat cream milk for best results.
- Always collect cream in a glass or steel container. Avoid plastic.
- To obtain thick cream from milk, boil milk and refrigerate for 7-8 hours.
- Always store collected cream in freezer to prevent it from turning sour and rancid.
- Use a deep pot or pan to simmer butter to prevent overflowing.
- Browning the milk solids gives a nice nutty flavour to ghee. However, do not burn the solids as ghee will turn bitter.

